
You never have to guess in Labyrinth: every maze can be worked out from its numbers. This guide shows how, first with the four patterns you will use all the time, then on a real board, level 2 of the forest, from the first number to the exit.
What a number counts
A number is the count of tiles you can see from its tile, looking straight in all four directions and stopping at the first wall in each. The tile itself is not counted. The edge of the board is a wall.
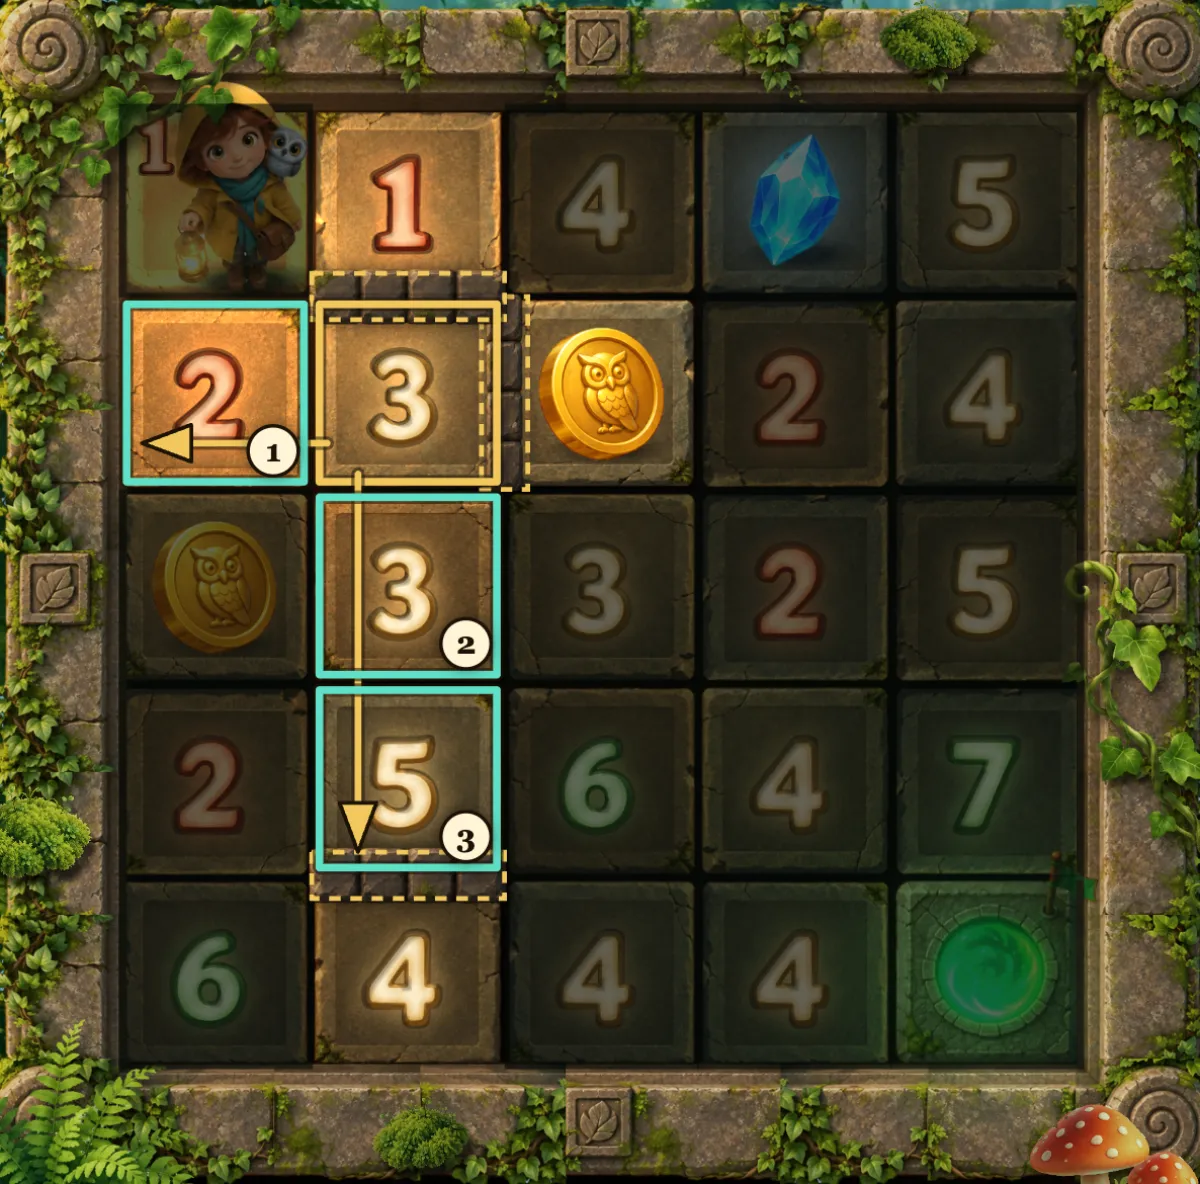
Two things follow from that, and they are all you need:
- The most a tile can see is every tile in its row and its column: 8 on a 5×5 board, 10 on 6×6, 12 on 7×7. A big number leaves little room for walls.
- Once a tile already sees its number, every line that could see further must be closed by a wall, right there.
There is one more fact about the mazes themselves: every tile can be reached. The game never builds a closed room, so a wall that would shut some tiles in cannot be there.
Four patterns
1. Two ones side by side
Two neighbouring tiles both show 1. If the border between them were open, each would already see the other, so every other side of both would be walled: a closed room of two tiles. Closed rooms do not exist, so there is a wall between them. Each 1 then sees its one tile in another direction.
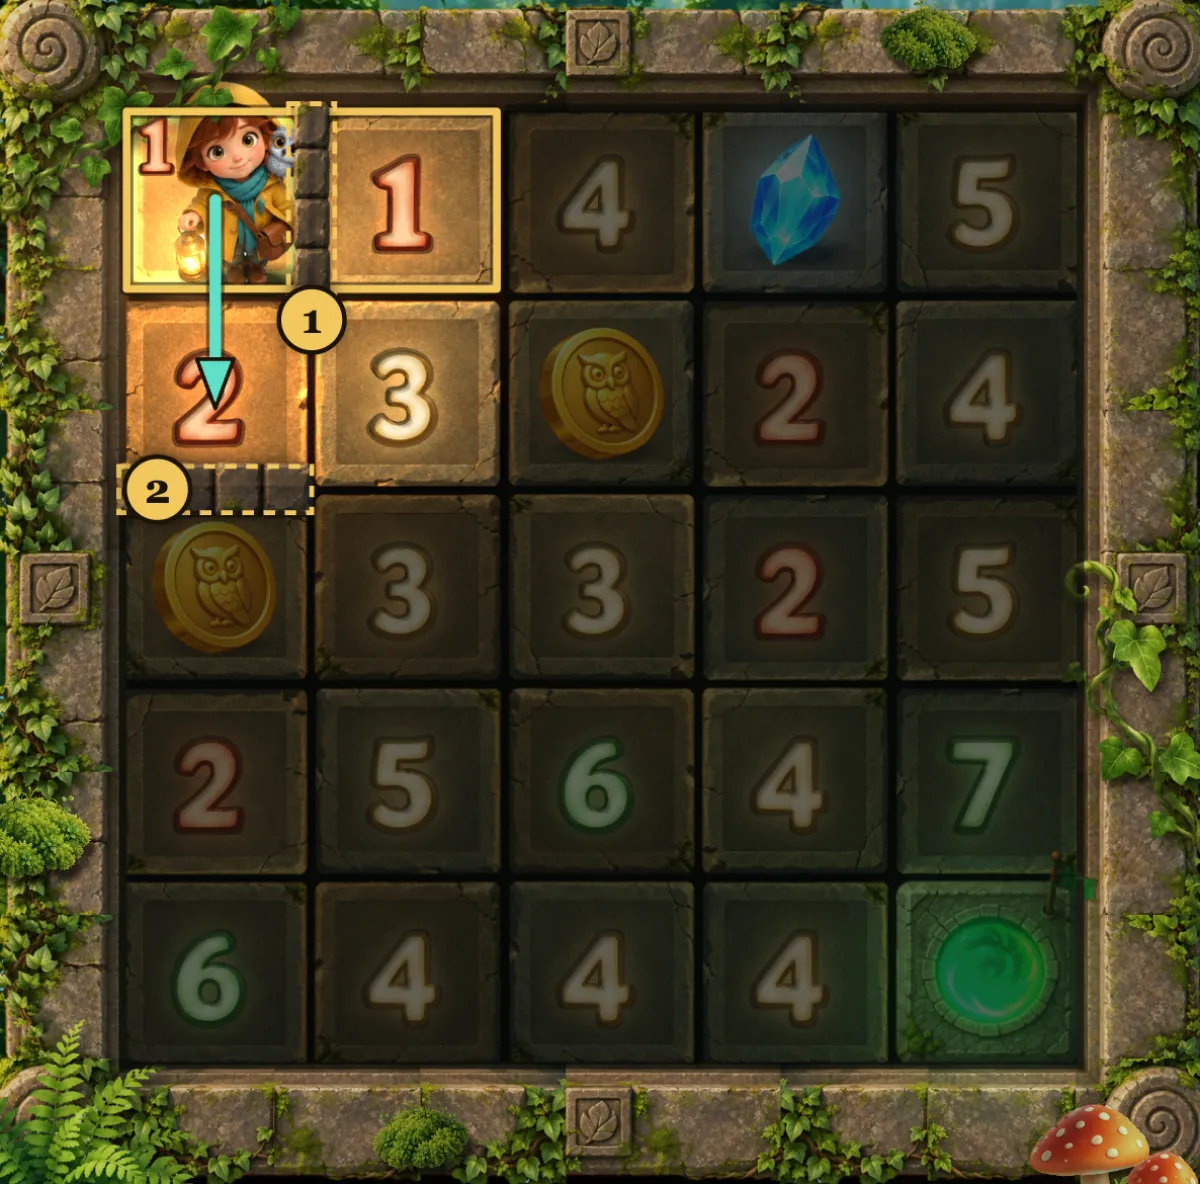
- The wall between the two 1s.
- The start's 1 is the tile below it, so the view stops there: a wall under that tile.
2. A big number in a corner
A corner tile can see at most 4 tiles up and 4 to the side on a 5×5 board. A 6 there means: if a wall stood right next to it, or after just one tile, in either line, the other line could not make up the rest. So both lines are open for at least two tiles.
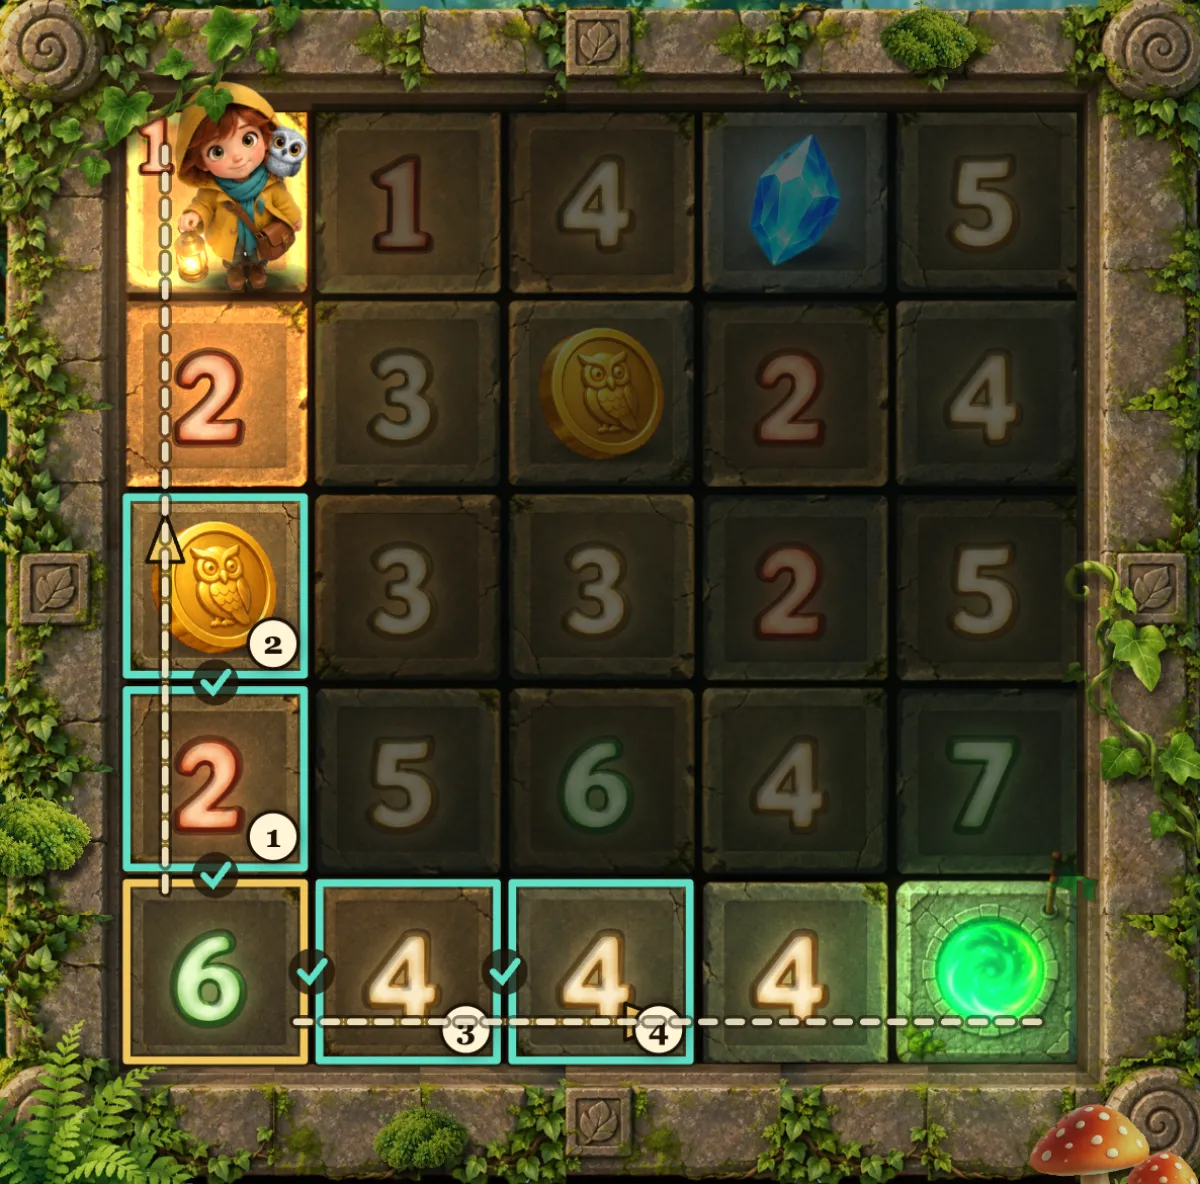
3. A tile that is already full
The 2 just above that corner sees the tile above it and the corner tile below it, both now known to be open. That is 2 already, so every other way out of its view is closed: a wall on its right, and a wall above the tile it sees upwards.
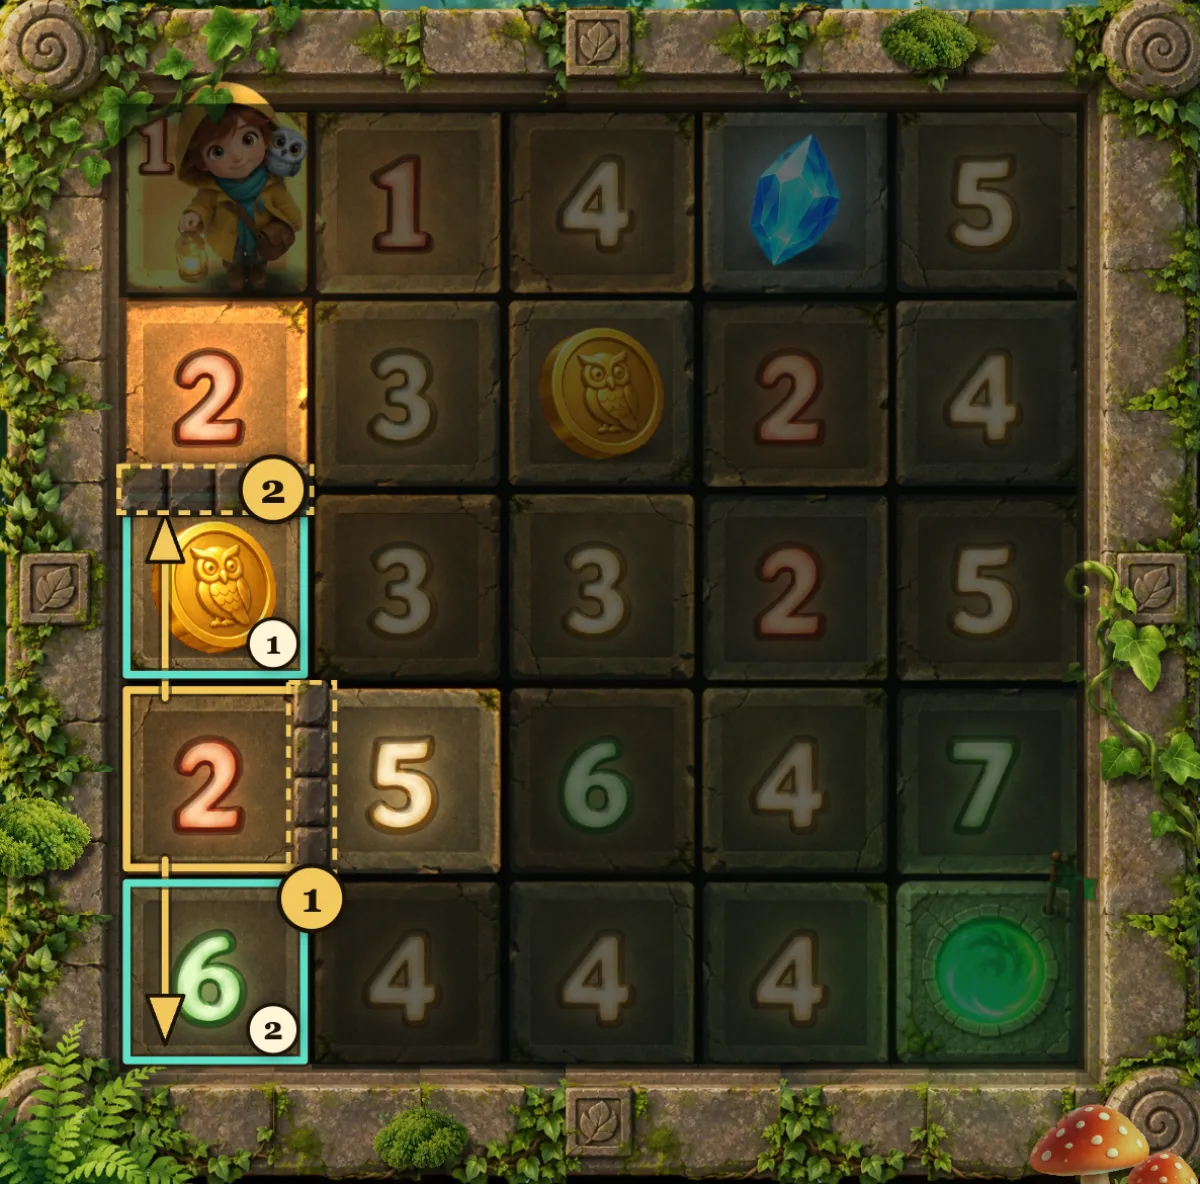
- The wall on its right.
- The wall that stops its view upwards.
4. One short of the most
The 7 on the right edge of the fourth row could see at most 3 up, 1 down and 4 to the left. Pattern 3 put a wall at the far end of its row, so the left line gives 3 at most: 3 + 1 + 3 = 7. It needs every one of them, so all those borders are open, including the one down to the exit.
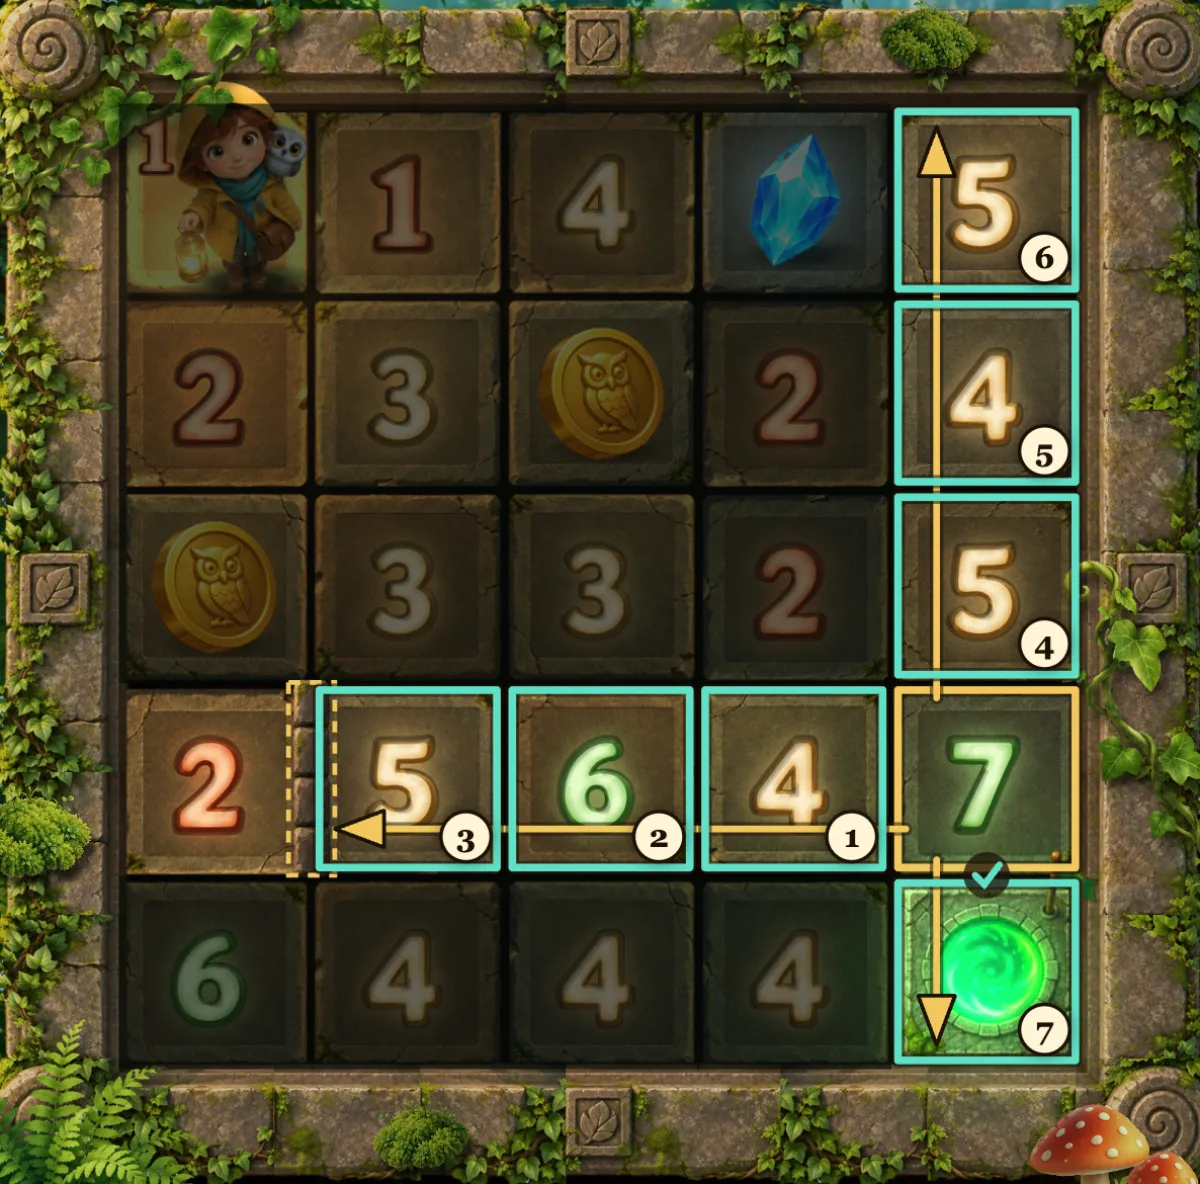
A real maze, solved
This is level 2 of the forest exactly as the game first gives it. Each picture is a screenshot of the game after the taps described, with the numbered marks added on top. The cream walls are the player's own walls.
Start with the two ones
Pattern 1 puts a wall between the start and the 1 to its right. Tap that border to mark it with your own wall. The start's single tile must be the one below, so step down, and the view stops there: mark a wall under your new tile.
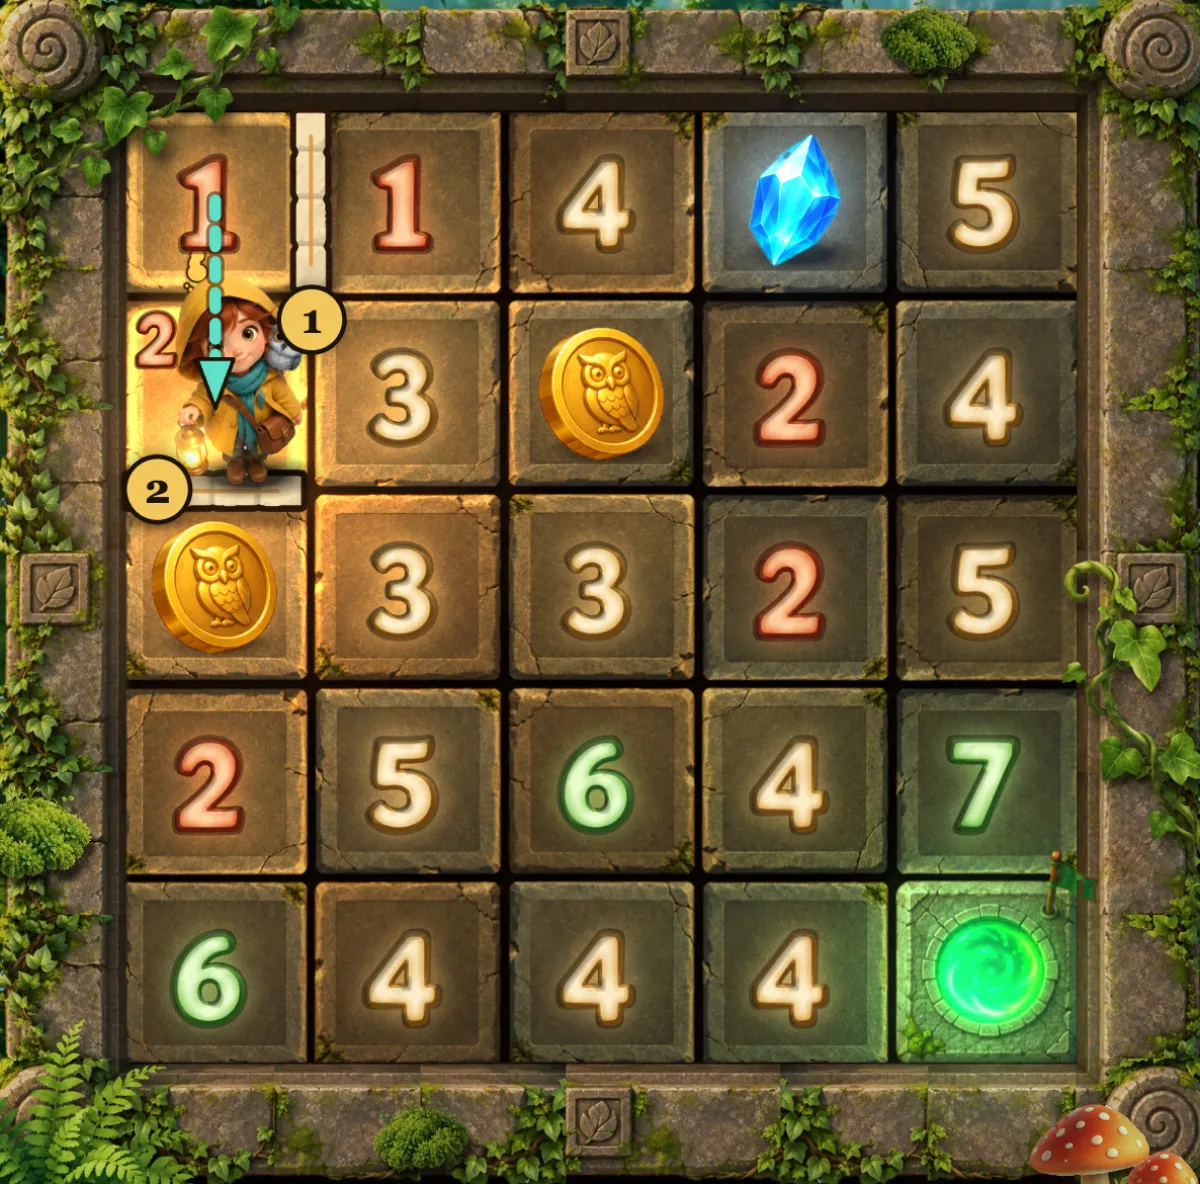
- Your own wall between the two 1s.
- Your own wall under the 2.
The 2 points to the right
Your tile shows 2. Above it is the start tile, one tile, then the edge. Below is your wall and to the left the edge. So it sees exactly one tile to the right, and nothing past it: step right and mark the wall on that tile's far side.
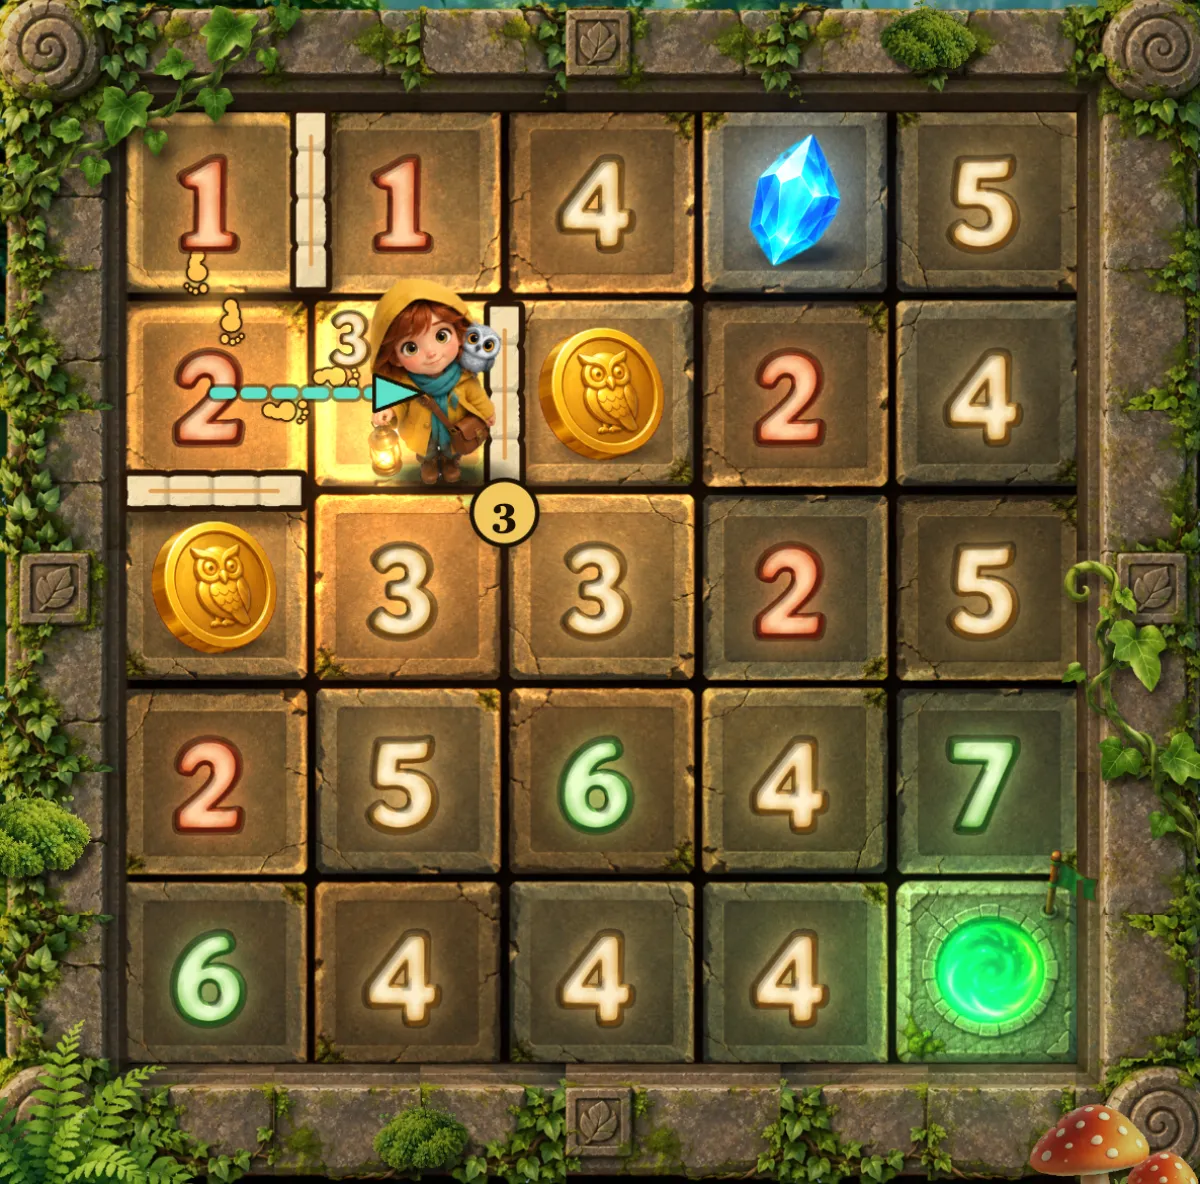
- Your own wall right of the 3.
The 3 has to look down
This 3 sees one tile to the left. To the right is your wall. Up, it can see one tile at the very most. That is 2, so it sees at least one tile down: the border below is open. Step down.
Now look at the corner: pattern 2 opens the bottom-left 6 two tiles each way, and pattern 3 then gives the 2 above it a wall on its right. Mark it.
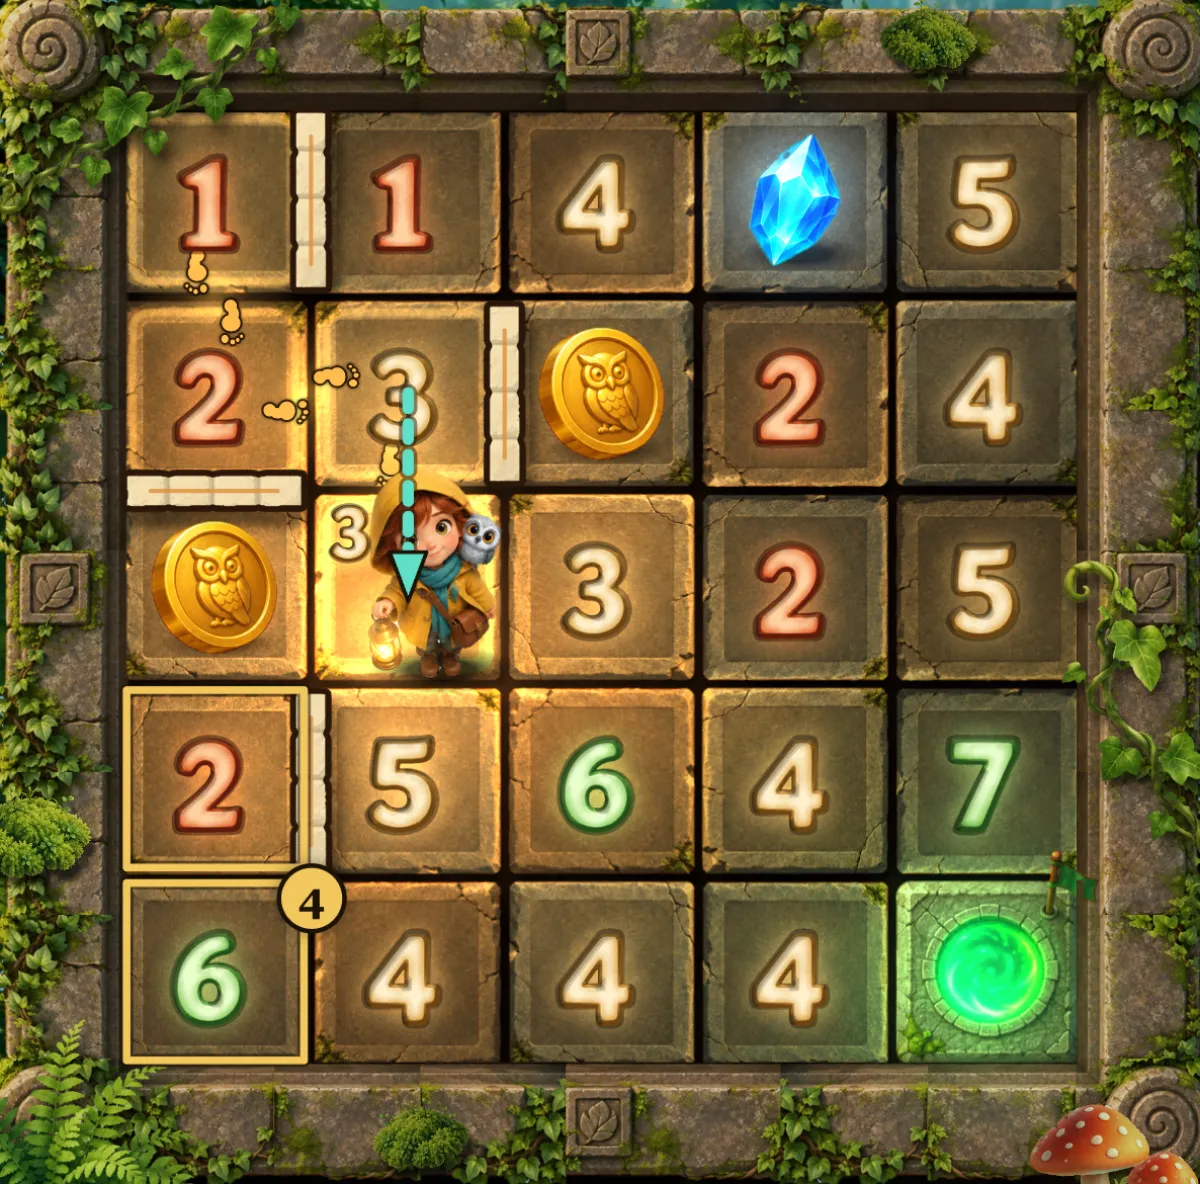
- Your own wall right of the 2 above the corner.
Straight to the exit
Pattern 4: with that wall at the left end of its row, the 7 needs every tile it could see, so the whole fourth row is open from the second tile on, and so is the border down to the exit.
One more step makes it safe to go down: the 5 under your hero sees 3 tiles to the right and nothing to the left, and at most 1 below, so it must see at least one tile above it, the one you stand on. Step down, tap the 7 at the end of the row and your hero walks there; then step onto the exit.
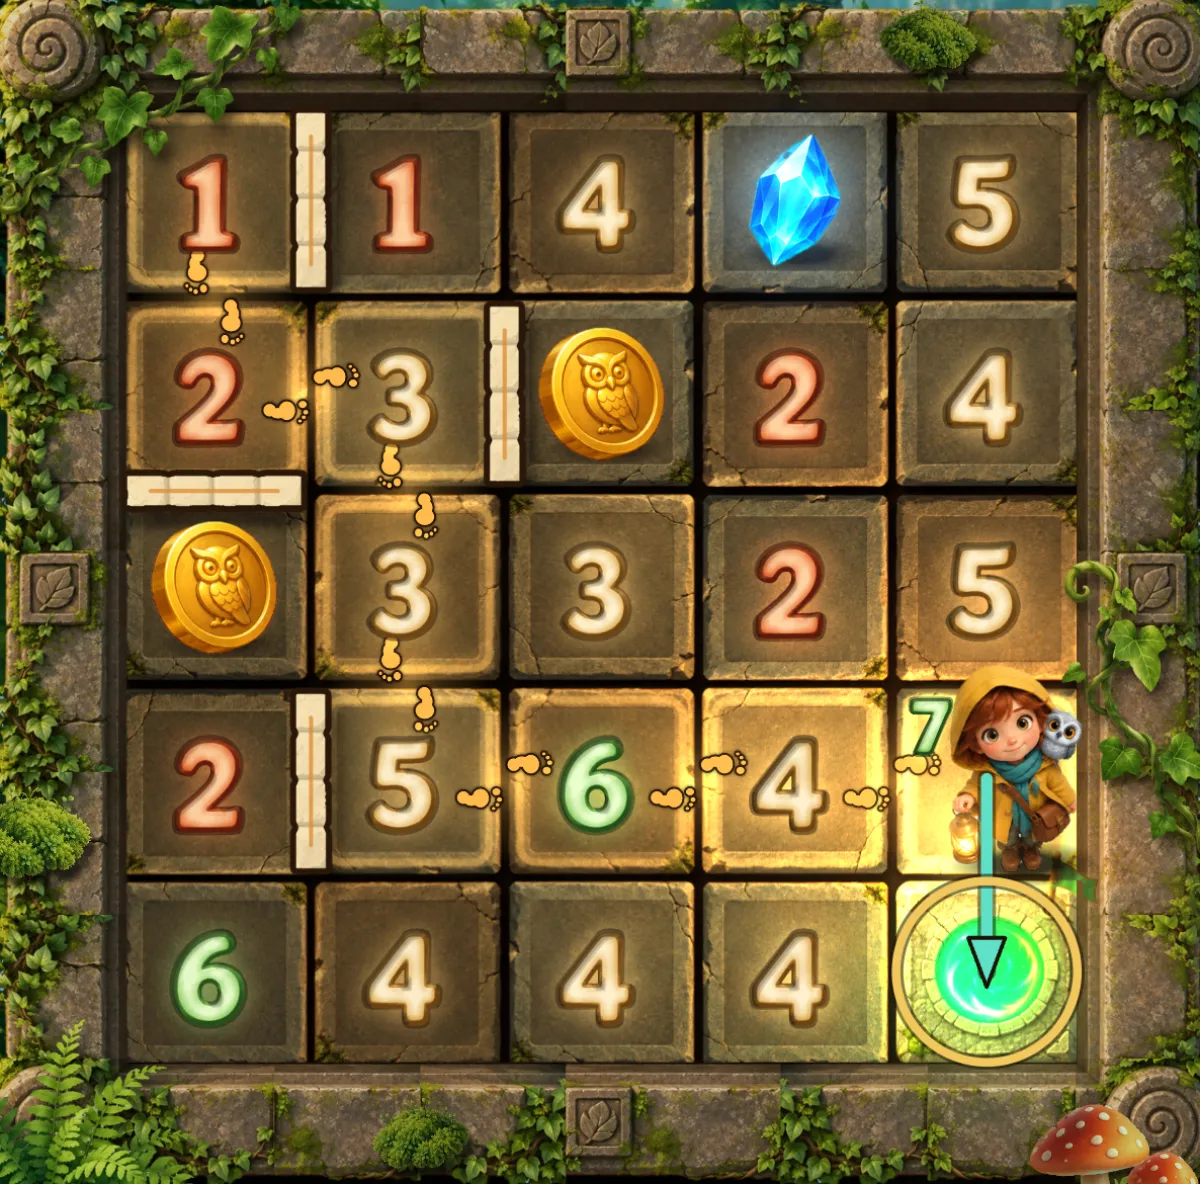
Seven steps so far, no bumps, no hints. Done
The exit opens and every hidden wall is shown for a moment. No bumps and no hints earn a star; reaching the exit earns another. The crystal in the top row was left behind, so the goal's star is missing: this win is two stars out of three. Collecting the crystal first, by the same kind of reasoning, gives all three.
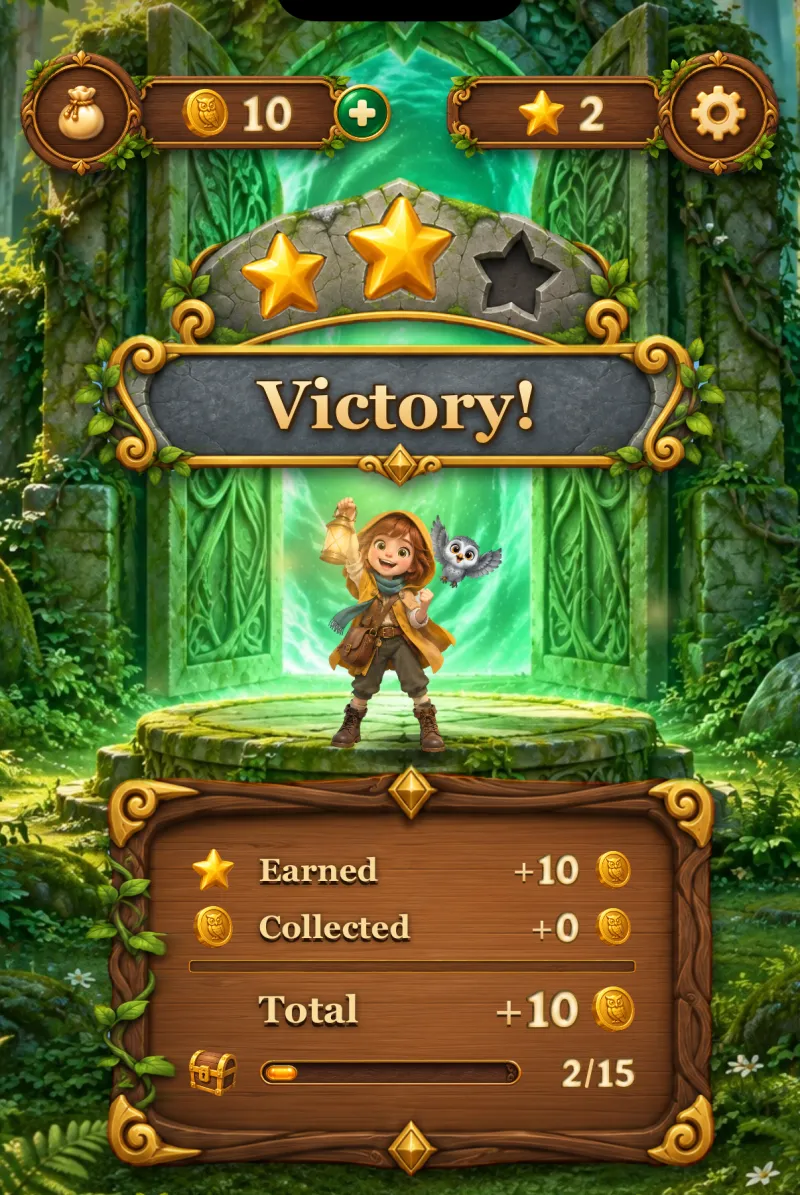
Two stars: the exit, and no bumps or hints.
When you are stuck
- Look for the biggest and the smallest numbers first: they give the most away.
- Count what a tile already sees for certain, and the most it could still see. If the two meet its number, its walls are decided.
- Use the tile you stand on: its number is shown in the corner of the tile.
- Mark every wall you are sure of. Your hero cannot walk through your own walls, and the board gets easier to read.
- Still nothing? A hint opens one border next to you. It costs coins and the third star, but never a heart.